Blue Diary
A lightweight & effective Todo app made with Flutter. Supports English and Korean.
Screenshots • Download • Usage • Architecture • Feedback • License •
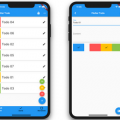
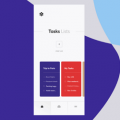
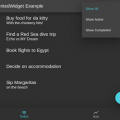
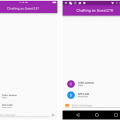
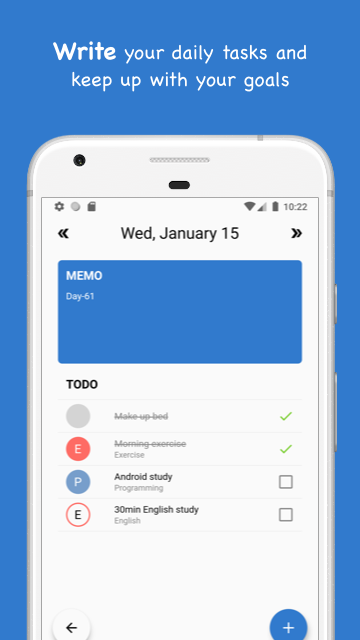
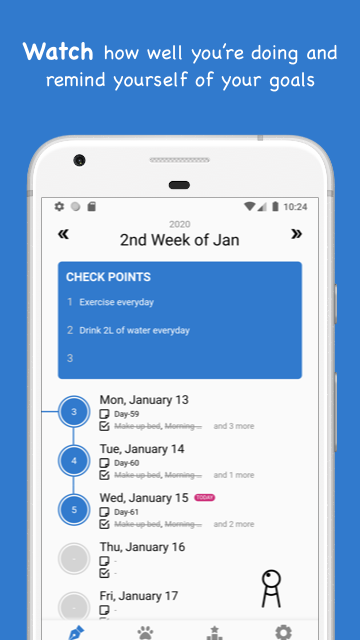
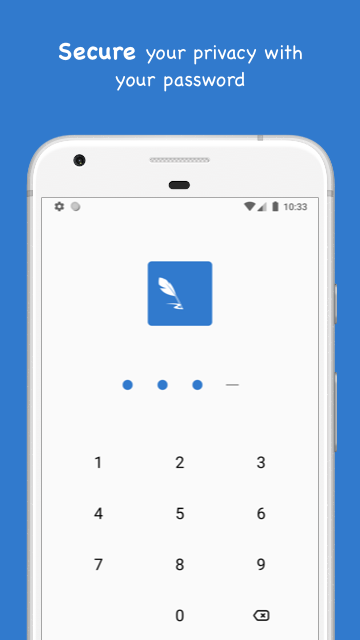
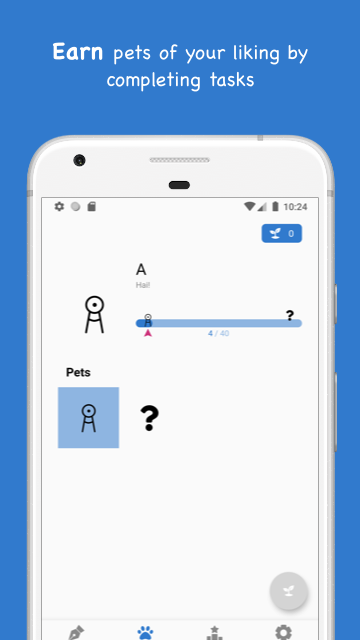
Screenshots

Download
![]()

Usage
You can build and run this app by yourself. You’ll need Git, Flutter, NPM and Android Studio installed.
Building this app for yourself needs 2 steps:
I’ll describe these steps in detail.
1. Basic Setup
First of all, clone this project by running command:
$ git clone https://github.com/giantsol/Blue-Diary.gitOpen cloned directory with Android Studio and it’ll notify you to run Packages get to install dependencies. Do that.
When you try to run the project by pressing Run button, build will fail because this app uses Sendgrid to send emails in SettingsBloc, and SENDGRID_AUTHORIZATION constant isn’t git-controlled (this is my secret key).
You can solve this in 2 ways:
-
You can follow Sendgrid guide and assign your own token to
SENDGRID_AUTHORIZATIONconstant:// Create lib/Secrets.dart file and add below line const SENDGRID_AUTHORIZATION = 'Bearer <<YOUR API KEY>>'; -
Just replace
SENDGRID_AUTHORIZATONto''. In this case, email sending won’t function, but other app functions will work just fine. In SettingsBloc file:headers: { HttpHeaders.authorizationHeader: SENDGRID_AUTHORIZATION, HttpHeaders.contentTypeHeader: 'application/json', },Replace above code with below:
headers: {
HttpHeaders.authorizationHeader: '',
HttpHeaders.contentTypeHeader: 'application/json',
},
Next is to integrate Firebase.
2. Firebase Integration
This app uses various features of Firebase, including Firebase Authentication, Cloud Firestore and more. If Firebase is not set up, you can still build the app, but you won’t be able to see the first screen.
(1) Create Firebase project
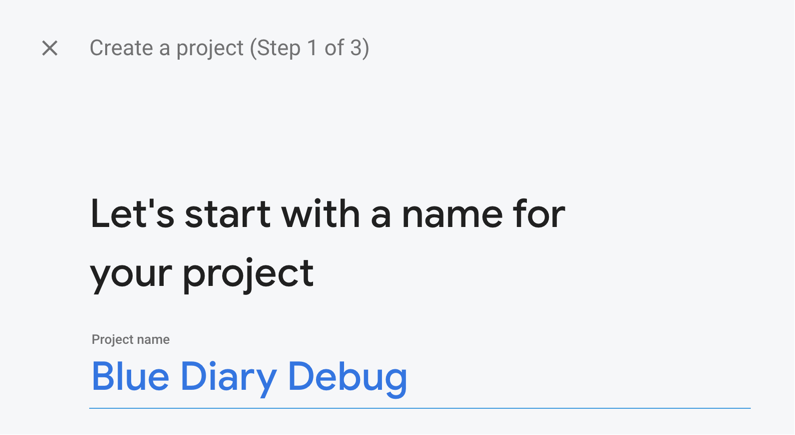
First, you have to create a new project in Firebase Console. Click Create a project as below:

Set a project name as below(can be anything else):
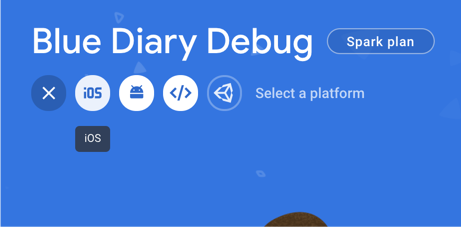
Go into your newly created project. We’ll add Android app first. Click Android button:

In package name, put com.giantsol.blue_diary.debug since this is the applicationId for debug builds. You can put anything for App nickname(e.g. Blue Diary Debug).
Click next, and click Download google-service.json and save it right below your-cloned-dir/android/app directory. You should skip step 3 and 4:

Run flutter packages get in your cloned directory to install dependencies.
Next we’ll add iOS app. Click iOS button:
In bundle ID, put com.giantsol.blue-diary.debug(note that iOS bundle id and Android applicationId is subtly different!). You can put anything for App nickname(e.g. Blue Diary Debug).
Click next, and click Download GoogleService-Info.plist and save it anywhere for now. You should skip step 3, 4 and 5:

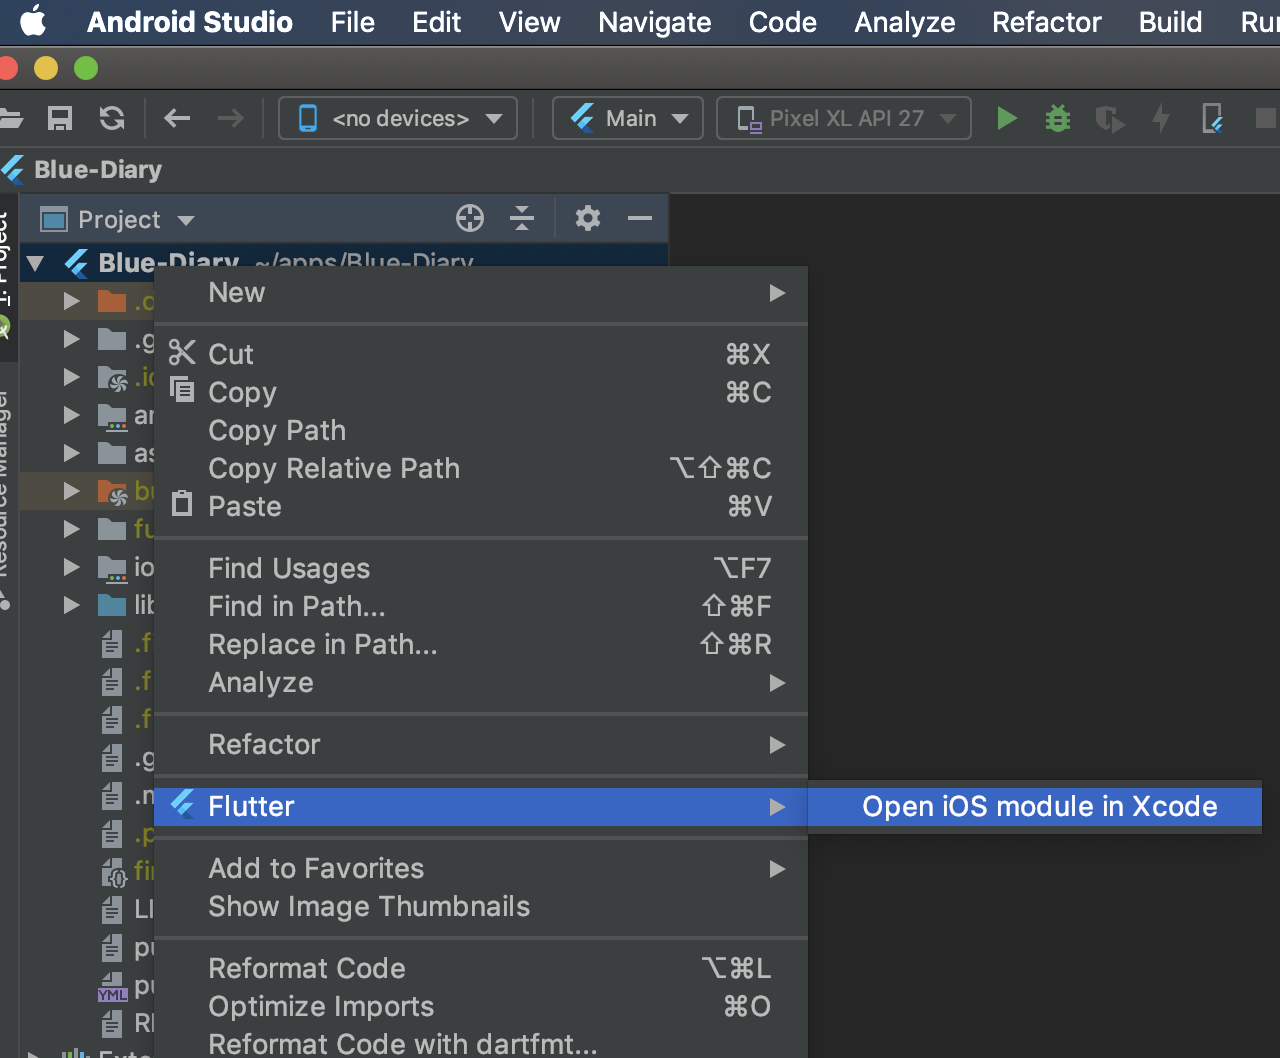
Open your cloned project using Xcode. If you’re using Android Studio, you can open ios module in Xcode by right clicking your project directory from Project panel – Flutter – Open iOS module in Xcode:
In Xcode, drag and drop GoogleService-Info.plist file you downloaded into Runner/Runner directory. Note that you must use Xcode in this procedure, since it needs to update indexes of file:

Done! Run flutter packages get in your cloned directory again.
(2) Firebase Authentication Integration
We use google sign-in. First, you need to turn on google sign-in function in your Firebase project by navigating to Authentication – Sign-in method tab and enabling Google by toggling switch button. Click Save:

Nothing else to do for Android, but if you’re planning to build on iOS, you need one more step. Go to your Info.plist file located in your-cloned-dir/ios/Runner/Info.plist. It should have below code:
<!-- Google Sign-in Section -->
<key>CFBundleURLTypes</key>
<array>
    <dict>
        <key>CFBundleTypeRole</key>
        <string>Editor</string>
        <key>CFBundleURLSchemes</key>
        <array>
            <!-- TODO Replace this value: -->
            <!-- Copied from GoogleService-Info.plist key REVERSED_CLIENT_ID -->
            <string>$(GOOGLE_SERVICE_INFO_REVERSED_CLIENT_ID)</string>
        </array>
    </dict>
</array>
<!-- End of the Google Sign-in Section -->
Change $(GOOGLE_SERVICE_INFO_REVERSED_CLIENT_ID) with your own GoogleService-Info.plist‘s REVERSED_CLIENT_ID value.
(3) Firebase Functions Integration
You need to deploy firebase functions to your Firebase project. First, run npm install -g firebase-tools from anywhere in cmd. If you don’t have npm installed, follow this link.
After firebase-tools is installed, run firebase login anywhere in your cmd to authenticate firebase tool.
Then run firebase init functions in your cloned directory. It would ask you for options. Select Use an existing project -> JavaScript -> No -> Yes as below:

New file should have been created as your-cloned-dir/functions/index.js. Copy and paste below code to index.js:
const functions = require('firebase-functions');
const admin = require('firebase-admin');
admin.initializeApp();
const db = admin.firestore();

exports.getTodayInMillis = functions.https.onCall((data, context) => {
    return Date.now();
});

exports.setMyRankingUserInfo = functions.https.onCall(async (data, context) => {
    const currentInMillis = Date.now();
    const uid = data.uid;
    const modifiedData = data;
    modifiedData.last_updated_millis = currentInMillis;
    await db.collection('ranking_user_info').doc(uid).set(modifiedData, { merge: true });
});
Finally, run firebase deploy --only functions from your cloned directory. This command uploads these functions to your firebase project server.
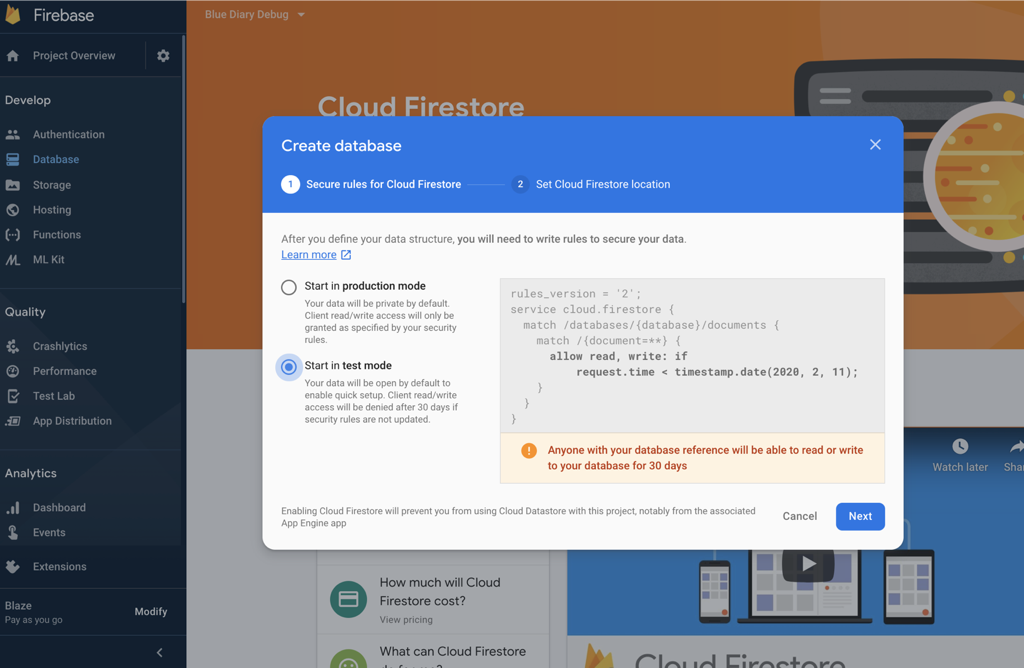
(4) Cloud Firestore Integration
Our last step is to create the database we need in your Firebase project. In your Firebase console, click Database – Create Database – Start in test mode:
When database is created, we need to create an index for this database. In Database page, click Indexes – Composite – Add index and fill in fields as below:

Click Create index and wait for the process to finish.
All Done! Build and run app. If you still can’t see the first screen although internet is connected, you should first check your Firebase account’s quota. Perhaps your Spark plan’s quota is all used. If there’s other problems, please leave Feedback!
Architecture
This app is based on BLoC pattern, together with my own architectural practices.
Inside the lib folder, there are three main folders:
-
data: This folder contains Dart files that actually update/fetch data from Preferences, Databases, or Network (although we don’t use Network here). Most of the files here are implementations of Repository interface declared in domain/repository folder.
-
domain: This folder contains the so called ‘Business Logic’ of this app. It is further divided into three main folders:
- entity: contains pure data classes such as ToDo and Category.
- repository: contains interfaces defining functions that update/fetch data. Actual implementations are located in data folder.
- usecase: contains per-screen business logics that utilizes several repositories to achieve each screen’s needs. This is the layer that presentation has access to to utilize app data. For instance, WeekScreen uses (well, actually WeekBloc uses) WeekUsecases to interact with data underneath without directly touching repositories.
-
presentation: This folder contains
Screens,Blocs andStates that are used to display UI. It is divided into further directories that correspond to each screens in the app.**Screen: where Widget’sbuildmethod is called to build the actual UI shown to the user. UI is determined by values insideState, and any interactions users make (e.g. clicking a button) are delegated to correspondingBlocs.**Bloc: what this basically does is "User does something (e.g. click a button)" -> "Set/Get data using corresponding usecase and update the values insideStateobect" -> "NotifyScreenthatStatehas changed and you have to rebuild".**State: holds all the informationScreenneeds to draw UI. For instance,currentDate,todos, andisLockedkinds of things.
Above three directories are divided to as closely follow Uncle Bob’s Clean Architecture pattern. Any tackles, highly welcomed.
Besides these directories are flat Dart files inside lib folder:
- AppColors.dart: just simple color constants.
- Delegators.dart: I used delegators when children needed to call parent’s methods. However, as I’ve become more familiar with Flutter now, I guess ancestorStateOfType can just do that job… researching on it!
- Dependencies.dart: contains singleton objects such as repositories and usecases. Basically, it enables a very simple injection pattern like
dependencies.weekUsecasesas in WeekBloc.dart. - Localization.dart: where localization texts are declared.
- Main.dart: the main entry point of this app.
- Utils.dart: Utils (duh).
If you have any questions, or have any suggestions to make this app better, do contact me as shown in Feedback. Thanks!
Feedback
Feel free to leave any feedback about this app, code, or whatever.
Leave Issues, Pull requests or email me at giantsol64@gmail.com.
License
MIT
Source Code
Please Visit Blue Diary Flutter ToDo App Source code at Github